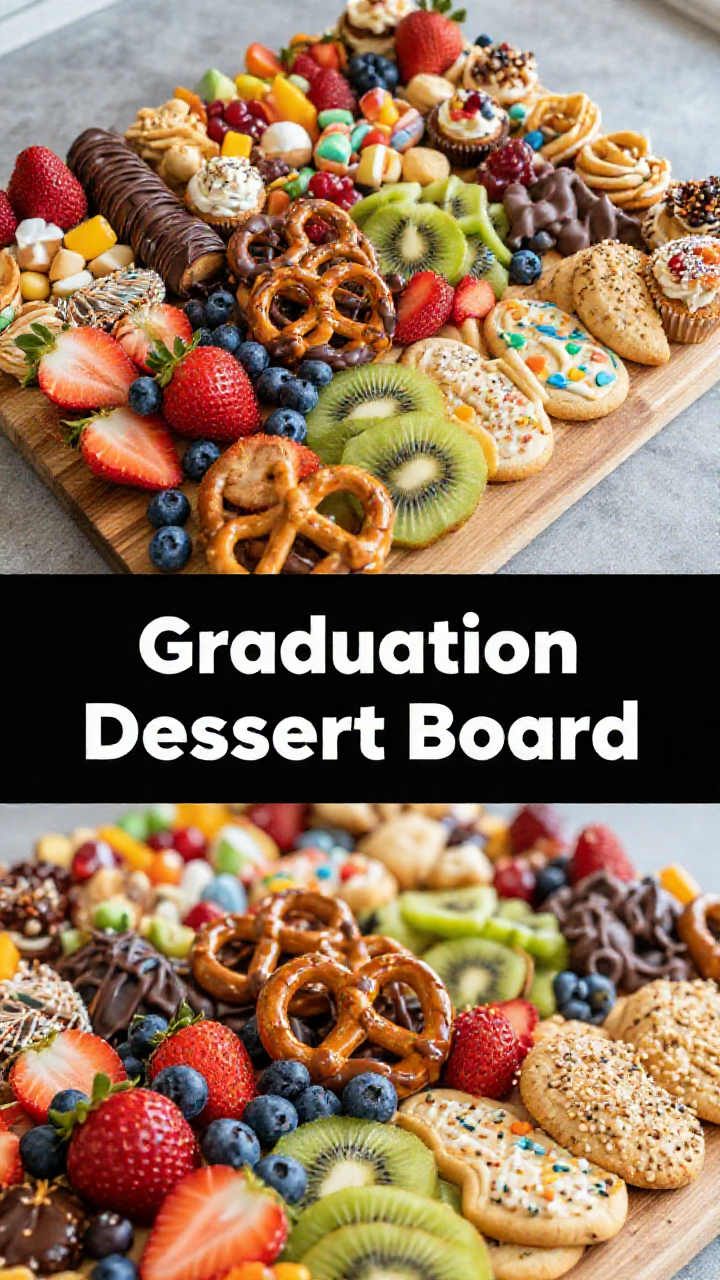
Hello, sweet friends! Maya here, from SugarVela.com. Oh, my heart does a little happy dance just thinking about today’s recipe: a Graduation Dessert Charcuterie Board! If you’re looking for a way to celebrate the graduate in your life, or any special occasion, really, this is it! It’s not just a dessert; it’s a joyful explosion of color, flavor, and pure, unadulterated happiness. It’s a sweet symphony on a board, and trust me, creating it is as much fun as devouring it. Let’s sprinkle some magic into your graduation party with this delightful dessert charcuterie board.
I remember when I first started experimenting with dessert boards. It felt like unlocking a secret code to instant party fabulousness. Suddenly, a simple gathering transformed into a visual feast, a sweet landscape that invited everyone to dive in and create their own perfect bite. And that, my friends, is the beauty of a dessert charcuterie board. It’s interactive, it’s customizable, and it’s guaranteed to bring smiles all around. This graduation dessert charcuterie is the perfect way to celebrate your graduate’s hard work!
Why You’ll Love This Graduation Dessert Charcuterie Board
Why will you absolutely adore this dessert charcuterie board? Oh, let me count the ways! It’s more than just putting sweets on a platter; it’s about crafting an experience, a moment of shared joy. Here’s why this dessert charcuterie board will steal the show at your graduation party:
- Visually Stunning: The vibrant colors and textures create a show-stopping centerpiece that will wow your guests. The board is a feast for the eyes before it’s a treat for the taste buds.
- Customizable: You can tailor the board to the graduate’s favorite sweets and colors. Make it personal, make it special! Your graduation dessert can be anything you want it to be!
- Easy to Assemble: No complicated baking skills required! Simply arrange pre-made treats for a stress-free dessert option. This graduation dessert charcuterie is so simple to set up.
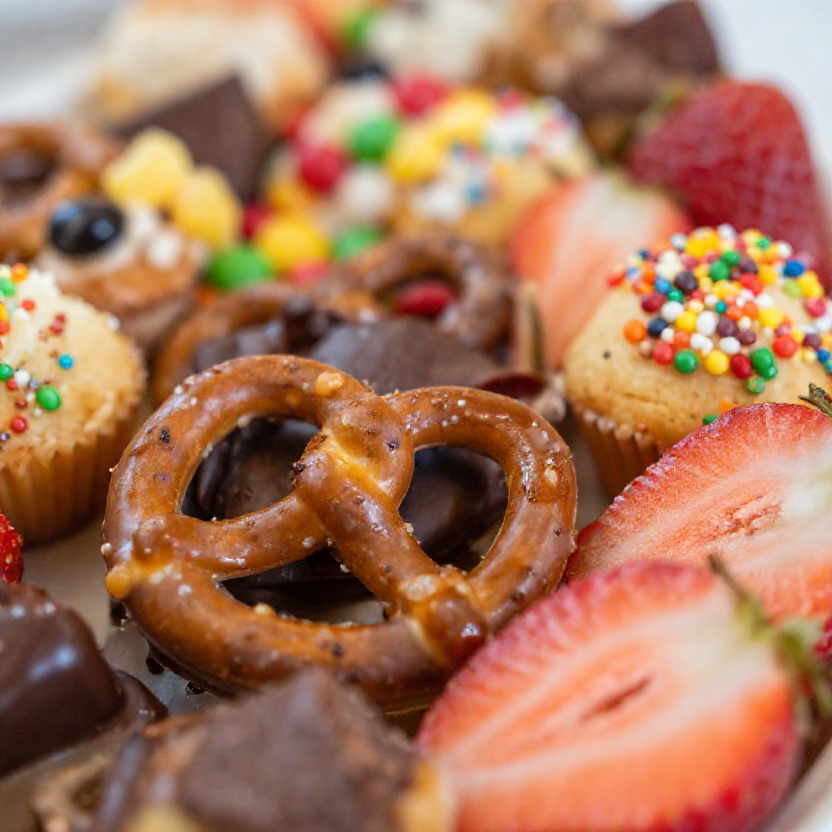
- Variety of Flavors: From fruity to chocolatey, there’s something for everyone to enjoy. The variety of sweet treats ensures that even the pickiest eaters find something they love.
- Perfect for Sharing: Encourages interaction and conversation as guests graze and create their own sweet combinations. The dessert charcuterie board is a wonderful way to bring people together to celebrate.
It’s truly the perfect way to celebrate the graduate’s accomplishments and create a memorable graduation party! This graduation dessert is sure to be a hit!
Ingredients You’ll Need
Here’s what you’ll need to create your own magical Graduation Dessert Charcuterie Board. Remember, this is just a suggestion – feel free to get creative and add your own personal touch! The beauty of a dessert charcuterie is that you can make it your own!
- 1 cup strawberries, halved
- 1 cup blueberries
- 1 cup kiwi, sliced
- 12 chocolate-covered pretzels
- 12 mini cupcakes (various flavors)
- 6 sugar cookies, decorated
- 1 cup assorted candies (gummy bears, chocolate bars)
How to Assemble Your Graduation Dessert Charcuterie Board
Ready to turn those ingredients into a work of art? Here’s how to assemble your Graduation Dessert Charcuterie Board, step by sparkling step. Remember, there’s no right or wrong way to do this – just have fun and let your creativity shine!
- Gather Your Supplies: First, gather all your ingredients and choose a large wooden board or platter. A round board works wonderfully, but any large, flat surface will do. It’s all about creating a canvas for your sweet masterpiece.
- Create a Fruity Foundation: Arrange the strawberries, blueberries, and kiwi as a colorful base. Scatter them around the board, creating little pockets of fruity goodness. This not only adds vibrant color but also offers a refreshing contrast to the richer sweets.
- Cupcake Clusters: Place mini cupcakes around the fruit for added color and sweetness. Group them in clusters for a visually appealing effect. This is a great way to showcase a variety of flavors and add a touch of whimsy to the board.
- Cookie Placement: Space out sugar cookies on the board for easy access. These decorated cookies can be themed to match the graduation, adding a personal and festive touch.
- Pretzel Power: Scatter chocolate-covered pretzels throughout for a delightful crunch. The salty-sweet combination is always a crowd-pleaser.
- Candy Completion: Fill any gaps with assorted candies to complete the display. Gummy bears, chocolate bars, or any other favorite candies will add that final touch of sweetness and fun.
And there you have it! A stunning Graduation Dessert Charcuterie Board that’s ready to wow your guests. It’s a sweet celebration on a platter, perfect for honoring the graduate and creating lasting memories. The board is now ready to go!
Pro Tips for the Perfect Dessert Charcuterie Board
Want to take your dessert charcuterie board to the next level? Here are a few pro tips to help you create a truly unforgettable experience:
- Color Coordination: Choose a color scheme that complements the graduation theme. This will create a cohesive and visually appealing board. Consider the graduate’s school colors!
- Vary Heights and Textures: Use small bowls or risers to add height and dimension to your board. This will make it more visually interesting and easier to access the treats.
- Freshness First: Use the freshest fruits and treats possible. This will ensure the best flavor and presentation. No one wants a wilted strawberry on their celebration board!
- Presentation Matters: Pay attention to the arrangement of your treats. A well-organized board is more inviting and appealing. Don’t be afraid to get creative and experiment with different layouts.
- Consider Dietary Needs: Offer gluten-free, vegan, or allergy-friendly options to accommodate all your guests. This shows that you care about everyone’s enjoyment.
Common Mistakes to Avoid
Even with the best intentions, a few common mistakes can derail your dessert charcuterie board. Here’s what to watch out for:
- Overcrowding: Don’t cram too many items onto the board. Leave some space so that each treat can shine. A cluttered board can be overwhelming and unappetizing.
- Lack of Variety: Offer a diverse range of flavors and textures to cater to different preferences. A board with only chocolate treats might not appeal to everyone.
- Neglecting Presentation: Don’t just throw everything on the board haphazardly. Take the time to arrange the treats in an appealing way. Presentation is key!
- Forgetting Serving Utensils: Provide small spoons, tongs, or forks so that guests can easily serve themselves without making a mess. This is especially important for sticky or messy treats.
- Ignoring Dietary Restrictions: Not considering dietary needs can leave some guests feeling excluded. Always ask about allergies or preferences beforehand.
Variations to Make It Your Own
The beauty of a dessert charcuterie board is that it’s endlessly customizable. Here are a few variations to inspire you:
- Theme It Up: Create a board based on the graduate’s favorite hobbies or interests. A sports-themed board, a book-themed board, or a music-themed board can add a personal touch.
- Seasonal Sensations: Use seasonal fruits and treats to reflect the time of year. A fall-themed board with apple cider donuts and pumpkin spice cookies can be perfect for an autumn graduation.
- Color-Coded Creations: Stick to a specific color palette to create a visually striking board. A board with all shades of blue or purple can be particularly elegant.
- DIY Dessert Bar: Include unfrosted cupcakes or plain cookies along with various toppings and frostings, allowing guests to create their own personalized desserts.
- International Inspiration: Incorporate desserts from different cultures, such as macarons, baklava, or mochi, for a global twist.
How to Store Leftovers (If There Are Any!)
While it’s hard to imagine any leftovers from such a delightful spread, here’s how to store them properly:
- Separate Items: Store fruits, cookies, and candies separately to prevent them from becoming soggy or stale.
- Airtight Containers: Use airtight containers to keep the treats fresh. This will prevent them from drying out or absorbing odors from the refrigerator.
- Refrigerate Fruits: Store cut fruits in the refrigerator to maintain their freshness. They will typically last for 1-2 days.
- Freeze for Later: Some items, like cookies and candies, can be frozen for longer storage. Wrap them tightly in plastic wrap before freezing.
- Reassemble with Care: When reassembling the board, check each item for freshness and discard anything that doesn’t look or taste good.
Frequently Asked Questions
Got questions? I’ve got answers! Here are some frequently asked questions about dessert charcuterie boards:
- What size board should I use?: The size of the board depends on the number of guests you’re serving. A 12-inch board is suitable for a small gathering, while a larger 18-inch or 24-inch board is better for a larger party.
- How far in advance can I assemble the board?: It’s best to assemble the board as close to serving time as possible to ensure freshness. However, you can prep the ingredients ahead of time by washing and cutting the fruits, and gathering the other treats.
- Can I use homemade treats instead of store-bought?: Absolutely! Homemade treats add a personal touch and can be a delicious addition to the board. Just make sure they are well-made and visually appealing.
- How do I prevent the fruit from browning?: To prevent fruits like apples and bananas from browning, toss them with a little lemon juice before placing them on the board.
- What if I don’t have a wooden board?: You can use any large platter, tray, or even a clean baking sheet as a substitute for a wooden board. Get creative!
Serving Suggestions for Your Graduation Dessert Charcuterie Board
Now that your board is ready, here are a few serving suggestions to make it extra special:
- Offer a Variety of Drinks: Pair the board with refreshing drinks like lemonade, iced tea, or sparkling cider.
- Provide Small Plates and Napkins: Make it easy for guests to enjoy the treats by providing small plates and napkins.
- Create a Dessert Station: Set up a dedicated dessert station with the charcuterie board as the centerpiece. Add other dessert options like ice cream or cake for a truly indulgent experience.
- Add Decorative Touches: Decorate the dessert station with balloons, streamers, and other graduation-themed decorations to create a festive atmosphere.
- Encourage Interaction: Encourage guests to mix and match the treats and create their own personalized dessert combinations. This will make the experience more interactive and fun.
And there you have it, my sweet friends! A complete guide to creating a Graduation Dessert Charcuterie Board that will dazzle your guests and celebrate the graduate in style. Remember, baking is all about having fun and adding a little sparkle to your life. So go ahead, embrace your inner baker, and create something truly magical! This is a lovely way to celebrate your graduate!
I hope this dessert charcuterie board brings joy to your graduation celebration. Remember to check out my other recipes for Pecan Cheesecake Bars, Strawberry Sugar Cookies, and Blueberry Cake for more sweet treat inspiration. You can also find tips on Frosting Colors and Diy Baking projects on my site. For more party ideas, explore my posts on Dessert Station setups and Birthday Food options. And if you’re looking for easy and creative projects, check out my Diy Desserts section. Happy baking, and happy graduation!

Graduation Dessert Charcuterie Board
Ingredients
Method
- Gather ingredients and choose a board.
- Arrange fruits as a colorful base.
- Place mini cupcakes around the fruit.
- Space out sugar cookies on the board.
- Scatter chocolate-covered pretzels throughout.
- Fill gaps with candies to complete.
Notes