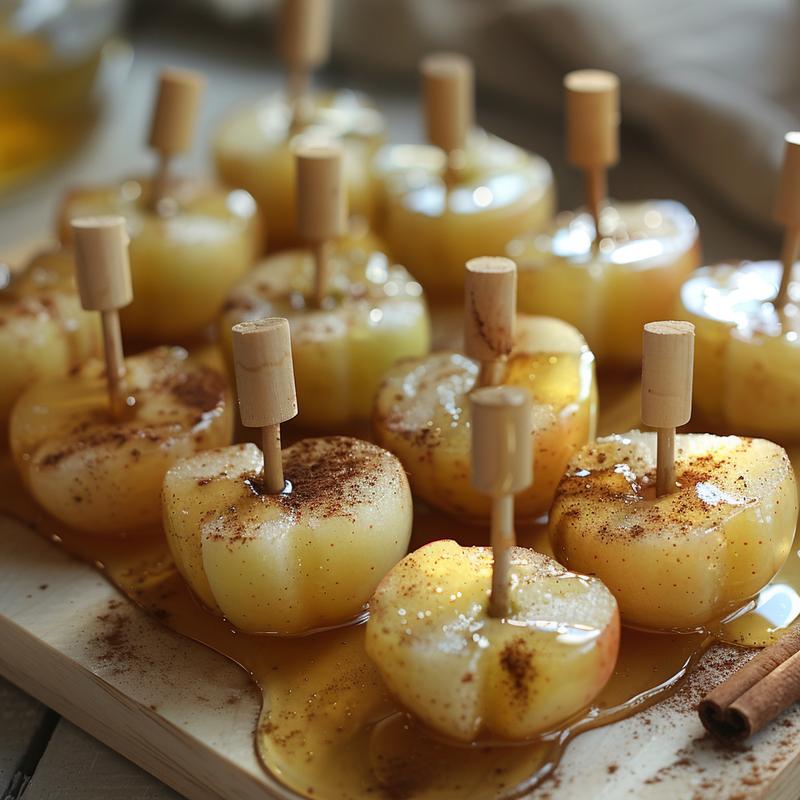
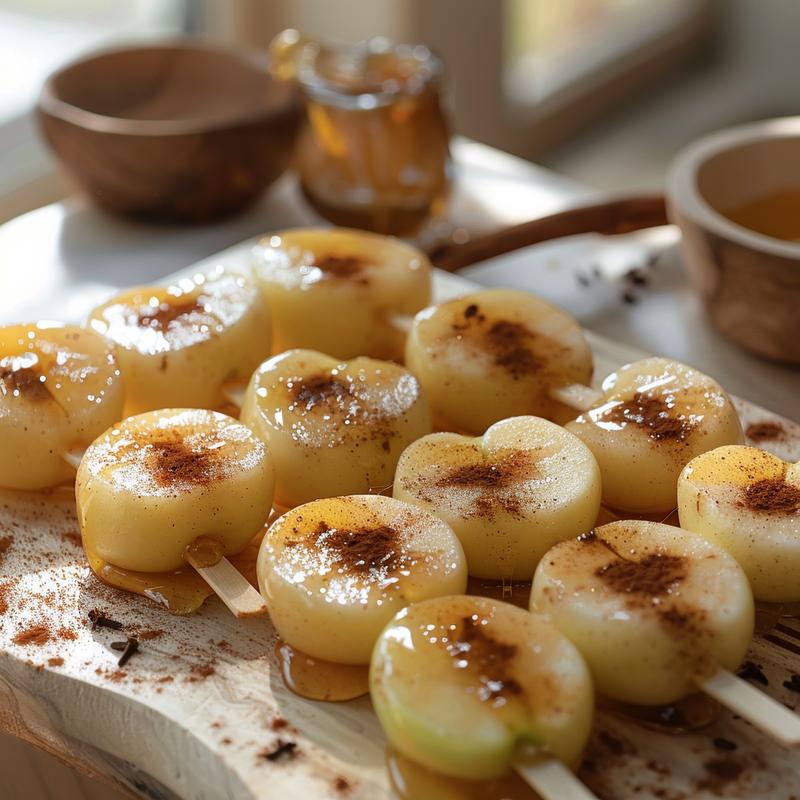
Hello, sweet friends! Maya here, from SugarVela.com. Today, we’re diving into a recipe that’s close to my heart: Honey Candy Apples. Imagine taking a crisp, juicy apple and enrobing it in a shimmering, golden shell of pure honey goodness. It’s like capturing a little bit of sunshine and wrapping it around nature’s perfect fruit. It’s a celebration of simple ingredients transformed into something truly magical. Get ready to make some of the best candy apples you’ve ever tasted!
My journey with desserts began with a simple desire to add a sparkle to everyday life. And these Honey Candy Apples? They’re the perfect embodiment of that. They bring a touch of wonder to any occasion, big or small. Forget the complicated recipes and the long list of ingredients. This one is all about pure, wholesome sweetness. It’s a recipe that feels like a warm hug, and I can’t wait to share it with you.
Why You’ll Love This Recipe
Oh, where do I even begin? These Honey Candy Apples are more than just a treat; they’re an experience! Here’s why you’ll absolutely adore them:
- Naturally Sweet: We’re ditching the corn syrup and embracing the golden goodness of honey. It’s a naturally sweet and healthier alternative that doesn’t compromise on flavor.
- Easy to Make: This recipe is so simple, even the most novice bakers can master it. With just a few ingredients and easy-to-follow steps, you’ll be enjoying these delightful treats in no time.
- Perfect for Any Occasion: Whether it’s a fall festival, a Halloween party, or just a cozy night in, these Honey Candy Apples are the perfect addition to any celebration.
- Customizable: Want to add a little extra sparkle? Feel free to sprinkle on some chopped nuts, shredded coconut, or even a drizzle of melted chocolate. The possibilities are endless!
- A Touch of Magic: There’s something truly magical about transforming simple ingredients into something so beautiful and delicious. These candy apples are sure to bring a smile to your face and a sparkle to your day.
Honestly, it’s one of the best recipes I’ve ever created. It’s simple, healthy-ish, and delicious. What’s not to love?
Ingredients You’ll Need
Let’s gather our ingredients! This list is short and sweet, just like the recipe itself:
- 6 small apples: Choose your favorite variety! I love using Gala or Fuji for their crispness and sweetness.
- 6 wooden sticks: You can find these at most craft stores or even in the baking aisle of your grocery store.
- 1 cup honey: Opt for a good-quality honey for the best flavor.
- 1/2 cup water: This helps to create the perfect candy coating consistency.
- 1/4 teaspoon cinnamon: Adds a warm and comforting touch.
- 1 tablespoon lemon juice: This helps to prevent the honey from crystallizing and adds a touch of brightness.
These apples are so easy to make when you have the ingredients. Make sure you have the right type of apples!
Step-by-Step Instructions
Ready to make some magic? Let’s get started!
- Prepare the Apples: Wash and dry the apples thoroughly. Insert a wooden stick into the stem end of each apple. Make sure the stick is secure so the apple doesn’t fall off during dipping.
- Combine Ingredients: In a medium saucepan, combine the honey, water, cinnamon, and lemon juice. This mixture is going to become the delicious candy coating.
- Bring to a Boil: Bring the mixture to a boil over medium heat, stirring constantly until the honey dissolves. This ensures that all the ingredients are well combined.
- Simmer to Perfection: Reduce heat to low and simmer for about 20-25 minutes, or until a candy thermometer reaches 300°F (hard-crack stage). If you don’t have a candy thermometer, you can test the consistency by dropping a small amount of the mixture into a bowl of cold water. If it forms a hard, brittle thread, it’s ready.
- Dip the Apples: Remove from heat. Quickly dip each apple into the hot honey mixture, coating evenly. Lift the apple and let any excess drip off. Work quickly, as the candy coating will start to harden as it cools.
- Set to Cool: Place the coated apples on a baking sheet lined with wax or parchment paper. This will prevent the apples from sticking to the pan.
- Cool and Enjoy: Let the candy apples cool completely before serving. This allows the candy coating to harden and set properly. Enjoy your homemade Honey Candy Apples!
And that’s the recipe! It’s one of the simplest, most rewarding things you can make.
Pro Tips for Perfect Candy Apples
Want to take your Honey Candy Apples to the next level? Here are a few pro tips to ensure they turn out perfectly every time:
- Dry Apples are Key: Make sure your apples are completely dry before dipping them. This will help the candy coating adhere properly.
- Use a Candy Thermometer: A candy thermometer is your best friend when making candy apples. It ensures that the honey mixture reaches the correct temperature for a perfect hard-crack stage.
- Work Quickly: Once the honey mixture is ready, work quickly to dip the apples. The candy coating will start to harden as it cools, so you want to make sure you coat the apples evenly before it sets.
- Tilt the Pan: If you’re having trouble coating the apples evenly, try tilting the pan to pool the honey mixture to one side. This will make it easier to dip the apples.
- Add a Drizzle: Once the candy apples have cooled, you can add a drizzle of melted chocolate or caramel for an extra touch of sweetness and flavor.
Common Mistakes to Avoid
Even with the simplest recipes, mistakes can happen. Here are a few common pitfalls to watch out for when making Honey Candy Apples:
- Not Drying the Apples: As mentioned before, dry apples are crucial for the candy coating to adhere properly.
- Under or Overcooking the Honey Mixture: If the honey mixture is undercooked, the candy coating will be too soft and sticky. If it’s overcooked, it will be too brittle and may crack.
- Letting the Candy Coating Cool Too Much: If the candy coating cools too much before dipping the apples, it will become too thick and difficult to work with.
- Using the Wrong Type of Apples: Some apples are too tart or too soft for candy apples. Choose a variety that is crisp and sweet for the best results.
- Not Using Parchment Paper: Placing the coated apples directly on a baking sheet without parchment paper will cause them to stick.
Avoiding these mistakes will ensure that your Honey Candy Apples turn out perfectly every time. It’s all about preparation!
Delicious Variations to Try
Want to get creative with your Honey Candy Apples? Here are a few delicious variations to try:
- Nutty Delight: Dip the coated apples in chopped nuts, such as pecans, walnuts, or almonds, for a crunchy and flavorful treat.
- Coconut Dream: Sprinkle the coated apples with shredded coconut for a tropical twist.
- Chocolate Indulgence: Drizzle the cooled candy apples with melted chocolate (milk, dark, or white) for an extra touch of sweetness.
- Cinnamon Spice: Add a pinch of ground cloves or nutmeg to the honey mixture for a warm and spicy flavor.
- Caramel Swirl: Drizzle the cooled candy apples with caramel sauce for a classic and irresistible combination.
- Hard Candy No Corn Syrup: Explore other hard candy recipes that don’t use corn syrup and apply that coating instead!
- Maple Syrup Candy: Try replacing the honey with maple syrup for a unique flavor profile.
- Cinnamon Candy: Infuse the honey mixture with extra cinnamon for an intense cinnamon flavor.
Let your imagination run wild and create your own unique variations! These apples are the best canvas for your culinary creativity.
How to Store Your Honey Candy Apples
If you happen to have any leftover Honey Candy Apples (which is unlikely!), here’s how to store them:
- Wrap Individually: Wrap each candy apple individually in plastic wrap to prevent them from sticking together.
- Store in the Refrigerator: Store the wrapped candy apples in the refrigerator for up to 2-3 days.
- Bring to Room Temperature: Before serving, bring the candy apples to room temperature for about 30 minutes to allow the candy coating to soften slightly.
Keep in mind that the candy coating may become sticky over time, so it’s best to enjoy them as soon as possible.
Frequently Asked Questions
Got questions? I’ve got answers! Here are a few frequently asked questions about making Honey Candy Apples:
- Can I use any type of apple? While you can use any type of apple, I recommend choosing a variety that is crisp and sweet, such as Gala, Fuji, or Honeycrisp.
- Can I make these ahead of time? Yes, you can make Honey Candy Apples ahead of time, but keep in mind that the candy coating may become sticky over time. It’s best to make them no more than 1-2 days in advance.
- Can I use a different type of sweetener? While I haven’t tested it myself, you could try using maple syrup or agave nectar as a substitute for honey. Just keep in mind that the flavor and consistency may be slightly different.
- How do I prevent the candy coating from sticking to the pan? To prevent the candy coating from sticking to the pan, line the baking sheet with wax or parchment paper.
- What is the hard-crack stage? The hard-crack stage is a term used in candy making to describe the temperature at which the sugar syrup becomes hard and brittle. This is typically around 300°F (149°C).
And there you have it! All your questions answered. If you have any more, feel free to ask!
Serving Suggestions
These Honey Candy Apples are delicious on their own, but here are a few serving suggestions to elevate your experience:
- With a Glass of Milk: Pair your Honey Candy Apple with a cold glass of milk for a classic and comforting combination.
- With a Scoop of Ice Cream: Serve your Honey Candy Apple with a scoop of vanilla or caramel ice cream for a decadent dessert.
- As a Party Favor: Wrap each Honey Candy Apple in cellophane and tie with a ribbon for a festive party favor.
- As Part of a Dessert Platter: Include Honey Candy Apples on a dessert platter alongside other sweet treats, such as cookies, brownies, and fruit.
- Soul Cake: These candy apples make a great alternative to a soul cake!
No matter how you choose to serve them, these Honey Candy Apples are sure to be a hit! I hope you enjoy making this recipe as much as I do. Remember, baking is all about having fun and adding a little sparkle to your day. Happy baking, my sweet friends!
And if you are looking for best books on baking, look no further than the library. It’s one of the best resources out there. You’re sure to find some of the best books. It’s one of the best ways to learn. The paper that lines the pan is key to ensure to prevent sticking. The heat needs to be just right, so turn the heat down if needed. Remember, the candy coating is the best part! The recipe is easy to follow, so don’t be afraid!

Candy Apples With Honey
Ingredients
Method
- Wash and dry apples; insert sticks.
- Combine honey, water, cinnamon, and lemon juice in a saucepan.
- Boil over medium heat, stirring until honey dissolves.
- Simmer on low for 20-25 minutes until candy thermometer reaches 300°F.
- Remove from heat; quickly dip apples, coating evenly.
- Place coated apples on parchment paper.
- Cool completely before serving.
Notes
Loved this recipe? Save it to your favorite Pinterest board so you can easily find it later! ✨