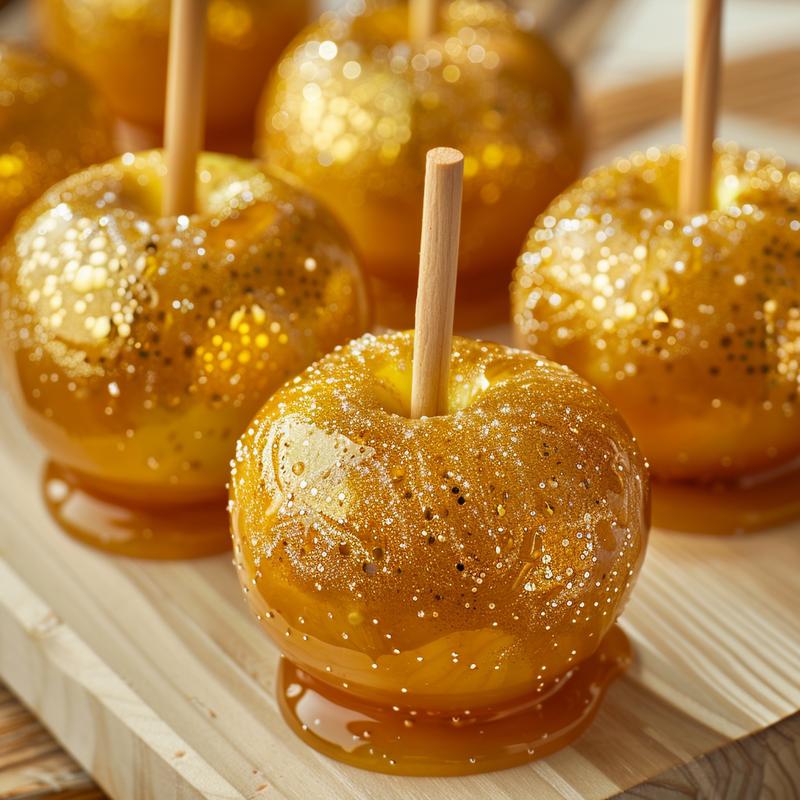
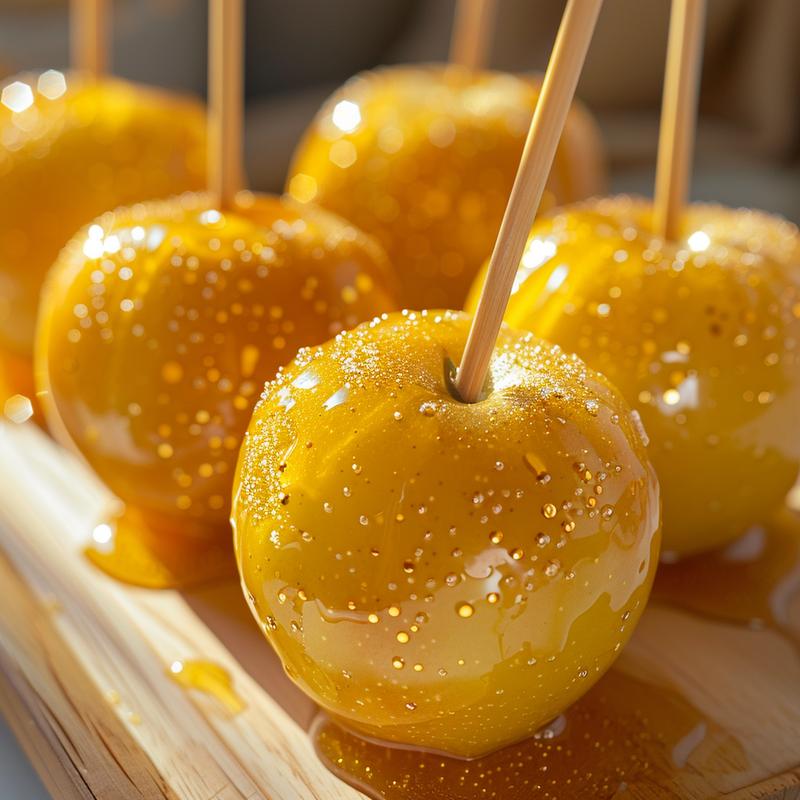
Oh, my dears, gather ’round, because Grandma Rose has a treat that’s as beautiful as it is delicious! We’re making gold candy apples, a shimmering delight that’s perfect for special occasions. Now, these aren’t just any candy apples; they’re touched with a bit of magic, a dash of nostalgia, and a whole lot of love. And because they’re best enjoyed fresh, I’m offering these beauties for local orders only. Let’s bring a bit of sparkle to your day, shall we?
Remember those autumn days at the county fair, darlings? The sweet smell of caramel, the bright lights, and those perfectly red candy apples? Well, we’re taking that classic treat and giving it a glamorous twist with glittering gold candy. These apples aren’t just a dessert; they’re a statement, a centerpiece, a little edible treasure. And the best part? Making them is simpler than you think, especially when you follow Grandma Rose’s tried-and-true method.
Why You’ll Love This Recipe
Oh, there are so many reasons, sweethearts! Let me tell you a few:
- Visually Stunning: The gold luster dust gives these apples a mesmerizing shimmer that’s sure to impress.
- Deliciously Classic: The crisp tartness of the apple perfectly complements the sweet, crunchy candy coating.
- Perfect for Special Occasions: Whether it’s a birthday, anniversary, or just a Tuesday that needs a little sparkle, these apples are sure to make it memorable.
- Made with Love: And that, my dears, is the most important ingredient of all.
Ingredients: The Heart of the Matter
Now, let’s talk ingredients. We want the best for our golden creations, so choose wisely, darlings.
- 6 Small Apples (Granny Smith or similar): I prefer Granny Smith apples for their tartness, which balances the sweetness of the candy perfectly. You can use other varieties, but make sure they’re firm and crisp.
- 6 Wooden Sticks: Make sure they’re sturdy enough to hold the weight of the apples.
- 2 cups Granulated Sugar: This is the foundation of our candy coating.
- 3/4 cup Water: Helps the sugar dissolve and create the perfect consistency.
- 1/2 cup Light Corn Syrup: Prevents crystallization and keeps our candy smooth and glossy.
- 1/4 tsp Salt: Just a pinch to enhance the sweetness.
- Gold Luster Dust (food grade): This is where the magic happens! Make sure it’s food-grade, darling. We don’t want any unwanted surprises.
- Water or Lemon Extract (for mixing luster dust): A few drops to create a paintable consistency with the luster dust edible.
Step-by-Step: Let’s Get Baking!
Alright, my dears, let’s get our aprons on and start creating some magic! Remember, the secret is patience and a little bit of love. Don’t rush, and don’t be afraid to get a little messy. That’s part of the fun!
- Prepare the Apples: Wash and dry the apples thoroughly. Remove stems and insert wooden sticks firmly into the core of each apple.
- Prepare the Baking Sheet: Line a baking sheet with parchment paper. Grease lightly. This will prevent the apples from sticking.
- Combine Ingredients: In a heavy-bottomed saucepan, combine the sugar, water, corn syrup, and salt.
- Cook the Candy: Cook over medium heat, stirring until the sugar is dissolved. Once dissolved, stop stirring and bring to a boil.
- Monitor the Temperature: Use a candy thermometer to monitor the temperature. Cook until the mixture reaches 300°F (149°C), or hard-crack stage. This may take 15-20 minutes. Be careful not to burn the sugar!
- Dip the Apples: Remove from heat immediately. Dip each apple into the hot candy mixture, swirling to coat evenly. Lift the apple and allow excess syrup to drip off.
- Set the Apples: Place the apples on the prepared baking sheet.
- Cool Completely: Let the candy apples cool completely until the candy coating is hard.
- Prepare the Gold Paint: In a small bowl, mix a small amount of gold luster dust with a few drops of water or lemon extract to create a paint-like consistency.
- Paint the Apples: Using a food-safe brush, paint the gold mixture onto the candy apples, covering as much or as little as desired.
- Dry and Serve: Allow the gold paint to dry completely before packaging or serving. These are for local orders only and should be delivered fresh.
Pro Tips from Grandma Rose
Here are a few of my secrets to making these glittering gold candy apples absolutely perfect, darlings:
- Use a Heavy-Bottomed Saucepan: This will prevent the sugar from burning and ensure even cooking.
- Don’t Stir After Dissolving: Stirring after the sugar has dissolved can cause crystallization, which will ruin your candy coating.
- Work Quickly: The candy hardens quickly, so have everything ready before you start dipping.
- Use a Candy Thermometer: This is the most accurate way to ensure your candy reaches the hard-crack stage.
Common Mistakes to Avoid
Even the best of us make mistakes, sweethearts. Here are a few common pitfalls to watch out for:
- Burning the Sugar: Keep a close eye on the temperature and remove the saucepan from the heat as soon as it reaches 300°F (149°C).
- Crystallization: Avoid stirring after the sugar has dissolved. If crystallization occurs, add a small amount of lemon juice or vinegar to the saucepan.
- Uneven Coating: Make sure to swirl the apple in the candy mixture to coat it evenly.
Variations: Let Your Creativity Shine!
Now, who says we have to stick to just gold? Let’s get creative, darlings! Here are a few variations to try:
- Rose Gold Candy Apples: Mix a little pink luster dust with the gold for a romantic, rosy hue.
- Black and Gold Candy Apples: Dip the apples in black candy melts before adding the gold luster dust for a dramatic effect.
- White and Gold Candy Apples: Dip the apples in white chocolate before adding the gold for an elegant look.
- Glitter Gold Candy Apples: Sprinkle gold sprinkles over the wet candy coating for extra sparkle.
Storage Instructions
These gold candy apples are best enjoyed fresh, darlings. But if you have leftovers, here’s how to store them:
- Store in a Cool, Dry Place: Keep them away from humidity, which can make the candy coating sticky.
- Wrap Individually: Wrap each apple in cellophane or plastic wrap to prevent them from sticking together.
- Consume Within 2-3 Days: They’re at their best when enjoyed soon after making.
Frequently Asked Questions
Got questions, sweethearts? Grandma Rose has answers!
- Can I use a different type of apple?: Yes, but make sure it’s firm and crisp. Granny Smith apples are my favorite because their tartness balances the sweetness of the candy.
- Can I make these ahead of time?: They’re best enjoyed fresh, but you can make them a day ahead of time if you store them properly.
- How do I prevent the candy coating from cracking?: Avoid sudden temperature changes. Let the apples cool slowly and evenly.
- Where can I buy gold luster dust?: You can find it at most baking supply stores or online. Just search for “dust edible gold“.
Serving Suggestions
These gold candy apples are a showstopper all on their own, but here are a few ways to make them even more special:
- Display on a Cake Stand: Arrange them on a cake stand for an elegant presentation.
- Wrap in Cellophane: Tie with a pretty ribbon for a beautiful gift.
- Serve with Ice Cream: A scoop of vanilla ice cream is the perfect complement to the sweet and tart flavors.
And there you have it, my dears! Grandma Rose’s gold candy apples recipe. I hope you enjoy making these as much as I do. Remember, the secret ingredient is always love. Happy baking! And don’t forget, these are available for local orders only. Let’s spread some golden joy together!

Gold Candy Apples Local Orders Only
Ingredients
Method
- Wash and dry apples. Insert sticks.
- Line baking sheet with parchment paper and grease.
- Combine sugar, water, corn syrup, and salt in a saucepan.
- Cook over medium heat, stirring until sugar dissolves, then boil without stirring.
- Cook to 300°F (149°C) using a candy thermometer.
- Remove from heat and dip apples into the hot candy mixture.
- Place coated apples on the prepared baking sheet.
- Cool completely until the candy coating is hard.
- Mix gold luster dust with water or lemon extract.
- Paint the gold mixture onto the candy apples.
- Allow the gold paint to dry completely before packaging or serving. Deliver fresh.
Notes
Loved this recipe? Save it to your favorite Pinterest board so you can easily find it later! ✨