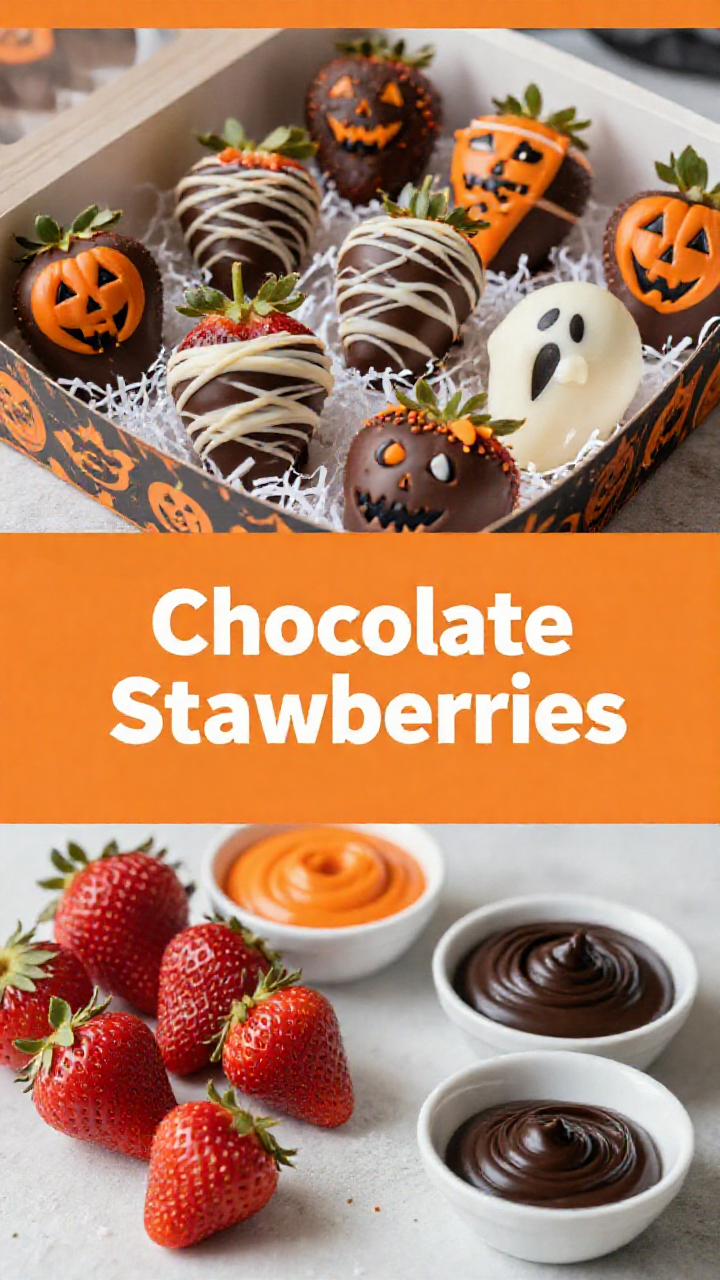
Oh, my dears, Halloween is just around the corner, and what better way to celebrate than with some adorable and delicious treats? Today, we’re making Halloween chocolate covered strawberries – a super easy recipe that’s perfect for spooky parties or a fun family activity. They’re ready in minutes, darling, and oh-so-satisfying. Just like I remember making them with my own little ones!
Why You’ll Love This Recipe, My Sweets
Now, why should you try this recipe, you ask? Well, let me tell you, darlings, these aren’t just any chocolate covered strawberries. They’re Halloween-themed, which makes them extra special, and they’re incredibly easy to make. Even if you’ve never dipped anything in chocolate before, you can do this! The secret is patience, my dears, and a little bit of love. Plus, they’re so much fun to decorate!
- Quick and Easy: Ready in just minutes, perfect for busy bees.
- Fun for All Ages: A delightful activity to do with the little ones.
- Customizable: Endless possibilities for decorating with different colors and sprinkles.
- Deliciously Spooky: A perfect balance of sweet and spooky for Halloween.
Ingredients: Gather ‘Round, Little Pumpkins!
Here’s what you’ll need to whip up these delightful treats:
- Strawberries: Fresh, plump, and ready to be dipped.
- Chocolate Candy Melts: Choose your favorite colors for a spooky theme. Black candy melts, white chocolate, orange – the sky’s the limit!
- Vegetable shortening or coconut oil: Just a touch to get the chocolate nice and smooth.
- Sprinkles: Halloween-themed, of course!
- Candy Eyes: These are optional but add a spooky cute factor.
- Piping Bags: For decorating. You can use ziplock bags too!
- Toothpicks: For easy dipping and holding.
Let’s Get Started: Step-by-Step Instructions
Alright, darlings, let’s get to the fun part! Follow these simple steps, and you’ll have the most adorable Halloween chocolate covered strawberries in no time.
- Prepare the Strawberries: Wash and dry your strawberries completely. This is so important, my dears, because wet strawberries will not hold the chocolate as well. We want that chocolate to stick like glue!
- Stem Control: Put toothpicks in the end of your strawberries and gently pull the stems back towards the toothpicks, to keep them out of the chocolate. This makes dipping easier.
- Melt the Chocolate: Melt your chocolate melts according the instructions on the package. I usually use the microwave, but you can also use a double boiler.
- Smooth It Out: If necessary, add a tiny bit of coconut oil or vegetable shortening. I find about ½-1 tsp per ½ cup of candy melts, and only if the candy melts have been overheated. But it can vary depending on the brand.
- Dip, Dip, Hooray!: Holding the toothpick, dip the strawberries in the chocolate and roll around to get the entire strawberry covered.
- Shake it Off: After you’ve dipped the strawberry, turn it upside down and gently shake and turn to evenly coat the strawberry with chocolate. This helps get rid of the excess chocolate.
- Set to Dry: Once it’s covered, place onto a styrofoam board or onto a piece of parchment or wax paper to dry.
- Sprinkle Time!: Immediately after you’ve dipped the strawberry in chocolate, pour sprinkles on top of the strawberry while holding it slightly above a piece of parchment paper. Turn the strawberry around as you pour to evenly cover in sprinkles.
- Reuse the Sprinkles: This makes it easy to reuse the sprinkles by using the parchment to put them back in a bowl or container.
- Sprinkle Placement: Place the sprinkle covered strawberry in the styrofoam or onto a clean piece of parchment paper to dry.
- Let the Base Dry: Let the base chocolate covered strawberries dry completely before adding any details.
- Prepare the Drizzle Bag: Put the second color into a tipless pastry bag and cut off a tiny piece of the tip. The size you cut off will determine how large the lines are on your strawberry.
- Drizzle Away: Gently drip the chocolate back and forth over the strawberry.
- More Sprinkles!: If adding sprinkles, pour on sprinkles while the drip lines are still wet and let dry completely before removing the excess sprinkles.
- One Color at a Time: Do one color at a time and let dry completely between each color.
- Sprinkle Removal: When adding sprinkles, let dry completely before removing the sprinkles. You can use a paint brush, pastry brush, or your fingers to gently wipe the excess sprinkles away. Again make sure the chocolate is completely dry before you remove the sprinkles, and you can reuse the sprinkles by using the parchment to put them back into a bowl.
- Repeat and Create: Repeat with different colors until you’ve got the covered strawberries of your dreams.
- Ghostly Goodness: Place melted white chocolate into a piping or ziplock bag. Cut off the tip and drip back and forth over a dried white chocolate covered strawberry until it’s completely covered, leaving a small space in the middle for the eyes.
- Eye See You!: Place small dots where the eyes are, and put on your candy eyes while the chocolate is still wet.
- Let Dry: Let the ghosts dry completely.
- Bloody Good Strawberries: Use a completely dry white chocolate covered strawberry.
- Dripping Blood: Place melted red chocolate candy melts into a piping bag. Cut off the tip and drip onto the top of the strawberry so it looks like dripping blood.
- Control the Drips: You can pick up the strawberry using the toothpick to help control the drips and placement of the drips.
- Practice Makes Perfect: Since this requires a bit of practice, I recommend practicing your faces onto a piece of parchment until you get a design and faces you like.
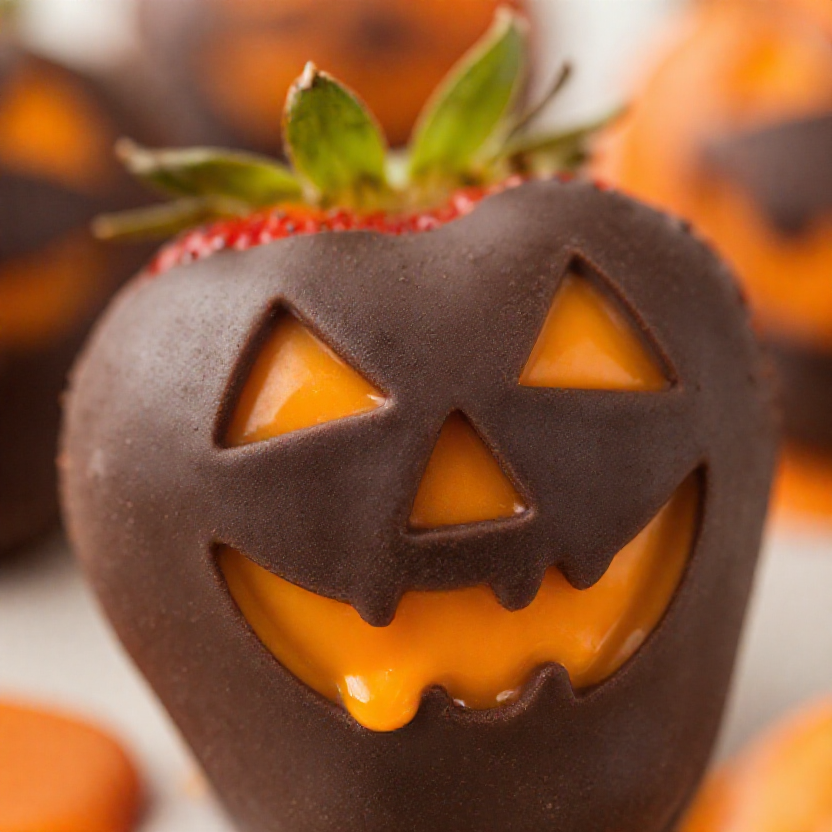
- Black Candy Faces: Place melted black candy melts thinned with shortening or coconut oil into a pastry bag and cut off a tiny piece of the tip.
- Draw Those Faces: Draw your faces onto the dried white and orange chocolate covered strawberries.
- Perfect the Details: Using a toothpick or scribe, gently move around the melted chocolate to get it into the exact design you want. This is a common royal icing technique and can help make sharp corners and tiny lines.
- Final Dry: Let dry completely before serving your spooky creations.
Pro Tips for Perfect Strawberries
Here are a few extra tips to ensure your Halloween chocolate covered strawberries are absolutely perfect, my dears:
- Dry Strawberries: Make absolutely sure the strawberries are completely dry before dipping them in the chocolate. Any moisture will cause the chocolate to seize up.
- Quality Chocolate: Use good quality chocolate candy melts for the best flavor and texture.
- Temperature Control: Keep the melted chocolate at a consistent temperature. If it starts to thicken, gently reheat it in the microwave in short bursts.
- Even Coating: When dipping, move around the strawberry in the chocolate to get an even coating.
- Parchment Paper: Always use parchment paper or wax paper to place the dipped strawberries on so they don’t stick.
Common Mistakes to Avoid
Even the best of us make mistakes, darling. Here are a few common ones to watch out for:
- Wet Strawberries: This is the biggest culprit! Always dry your strawberries thoroughly.
- Overheating Chocolate: Overheating can cause the chocolate to become grainy. Melt it in short intervals, stirring in between.
- Too Much Shortening: Adding too much shortening or oil can make the chocolate too thin and runny.
- Impatience: Don’t rush the drying process. Let the chocolate dry completely before adding more decorations.
Variations: Get Creative, My Lovelies!
The best part about this recipe is that you can get as creative as you like! Here are a few variations to try:
- Different Chocolate: Use dark chocolate, milk chocolate, or even flavored chocolate.
- Nutty Goodness: Dip the strawberries in chopped nuts or toasted coconut after dipping them in chocolate.
- Caramel Drizzle: Drizzle caramel over the chocolate covered strawberries for an extra touch of sweetness.
- Different Sprinkles: Use any sprinkles you like! The possibilities are endless.
- Candy Melts: Experiment with different colors of candy melts for a truly unique look.
Storage: Keeping Them Fresh
If you have any leftover chocolate covered strawberries (which I doubt!), here’s how to store them:
- Refrigerate: Store the strawberries in an airtight container in the refrigerator for up to 2 days.
- Room Temperature: They can also be stored at room temperature for a few hours, but they are best when chilled.
- Avoid Freezing: Freezing is not recommended as it can change the texture of the strawberries and chocolate.
Frequently Asked Questions
Here are some common questions I get asked about making chocolate covered strawberries, my dears:
- Can I use frozen strawberries?: No, darling, frozen strawberries will be too watery and won’t hold the chocolate properly.
- How do I prevent the chocolate from cracking?: Make sure the strawberries are completely dry, and don’t overheat the chocolate.
- Can I make these ahead of time?: Yes, you can make them a day ahead of time, but they are best when fresh.
- What if my chocolate is too thick?: Add a tiny bit of vegetable shortening or coconut oil to thin it out.
- What if my chocolate is too thin?: Let it cool slightly before dipping.
Serving Suggestions: Share the Love!
These Halloween chocolate covered strawberries are perfect for:
- Halloween Parties: A spooky and sweet treat for your guests.
- Gifts: A thoughtful and homemade gift for friends and family.
- Dessert: A simple and delicious dessert for any occasion.
- Family Activity: A fun and creative activity to do with the kids.
And there you have it, my dears! Grandma Rose’s Speedy Halloween Chocolate Covered Strawberries. I hope you enjoy making these as much as I do. Remember, the secret is patience and a little bit of love. Happy baking, and Happy Halloween!

Halloween Chocolate Covered Strawberries
Ingredients
Method
- Wash and dry strawberries completely.
- Insert toothpicks and pull stems back.
- Melt chocolate melts per package instructions.
- Add shortening/oil if needed (½-1 tsp per ½ cup).
- Dip strawberries in chocolate, roll to cover.
- Turn upside down, shake to coat evenly.
- Place on styrofoam/parchment to dry.
- Pour sprinkles on top immediately.
- Reuse sprinkles with parchment.
- Place sprinkle-covered strawberry to dry.
- Let base chocolate dry completely.
- Put second color in pastry bag, cut tip.
- Cut size determines line size.
- Drip chocolate back and forth.
- Add sprinkles while wet, let dry.
- Do one color at a time, let dry.
- Let sprinkles dry, remove excess.
- Repeat with different colors.
- Drip white chocolate over strawberry, leave space.
- Add candy eyes while wet, let dry.
- Let dry.
- Use dry white chocolate strawberry.
- Drip red chocolate for blood effect.
- Use toothpick to control drips.
- Practice faces on parchment first.
- Place black candy melts in pastry bag.
- Draw faces on dried strawberries.
- Use toothpick to move chocolate.
- Let dry.
Notes