

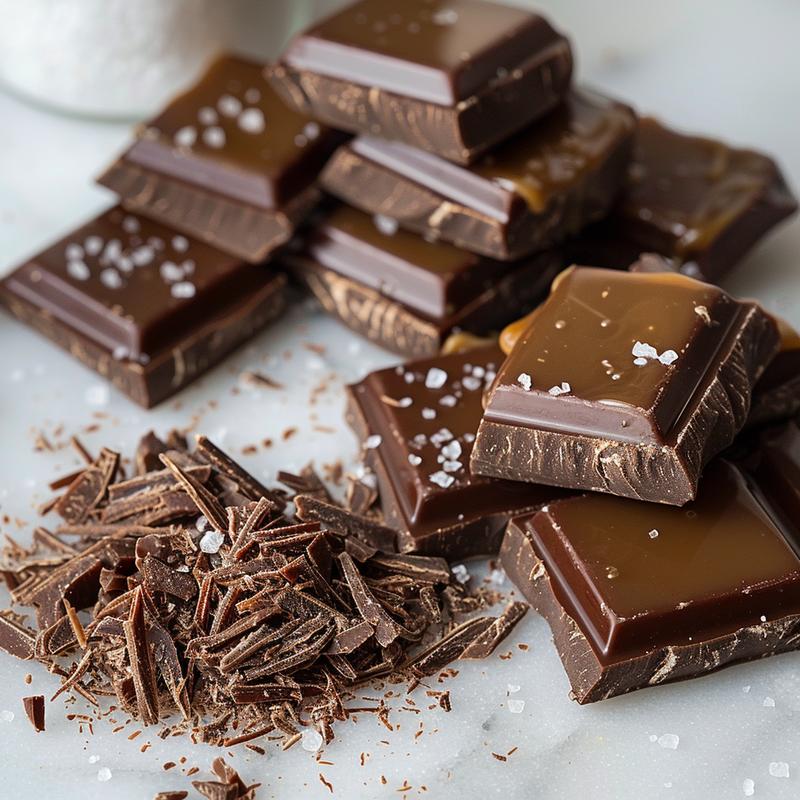
Homemade Salted Caramel Chocolate Candy Recipe: A Sweet Symphony
Oh, darling, have I got a treat for you! Imagine sinking your teeth into a luscious, homemade salted caramel, enrobed in a blanket of rich, decadent chocolate. It’s pure magic, isn’t it? This isn’t just a recipe; it’s an invitation to create a little sparkle in your day. I’m Maya, and I’m thrilled to share with you my absolute favorite recipe for Homemade Salted Caramel Chocolate Candy. It’s easier than you think, and the results are simply divine. Get ready to transform your kitchen into a candy wonderland!
Why You’ll Absolutely Love This Recipe
There’s something so special about making your own candy at home. It’s a little act of love, a way to show yourself and others that you care. And these chocolate covered caramels? They are simply irresistible. Here’s why you’ll fall head over heels:
- Unbeatable Flavor: The combination of sweet caramel and salty chocolate is a match made in heaven. It’s a flavor explosion that will dance on your taste buds.
- Homemade with Love: Nothing beats the taste of homemade. You control the ingredients and can customize the flavors to your liking.
- Perfect for Gifting: These candies make the most lovely gifts for friends, family, or even yourself! Package them in a pretty box or tin for a truly special touch.
- Surprisingly Easy: Don’t let the idea of making caramel intimidate you. This recipe is straightforward and simple, even for beginner candy makers.
- A Little Moment of Joy: Baking is more than just following a recipe; it’s about creating something beautiful and delicious that brings joy to yourself and others.
Gather Your Ingredients: The Magic Starts Here
Before we dive into the steps, let’s make sure you have all the necessary ingredients. It’s like gathering your tools for a grand adventure! Here’s what you’ll need:
- Granulated Sugar: The foundation of our sweet caramel.
- Butter: Adds richness and that melt-in-your-mouth texture.
- Heavy Cream: Creates a smooth and creamy caramel.
- Sea Salt: The secret ingredient that elevates the flavor to a whole new level. A few flakes make all the difference.
- Vanilla Extract: A touch of warmth and complexity.
- Chocolate: Choose your favorite – milk chocolate or dark chocolate, both work beautifully!
- Coconut Oil: Helps to create a smooth and glossy chocolate coating.
Step-by-Step: Creating Your Caramel Masterpiece
Now for the fun part! Follow these steps, and you’ll be rewarded with the most divine chocolate covered caramels you’ve ever tasted. Remember, baking is a journey, so enjoy every step of the way!
- The Sugar’s Transformation: Warm granulated sugar in a saucepan over medium heat. Watch as the sugar melts into a golden liquid. This is the beginning of the magic!
- Stirring the Dream: Stir constantly as the sugar melts. This prevents burning and ensures even caramelization.
- Butter’s Embrace: Add butter, stirring until fully incorporated. The butter will melt into the sugar, creating a rich and fragrant mixture.
- Creamy Revelation: Gradually add heavy cream while stirring continuously. The mixture will bubble, so be careful! This is where the caramel gets its creamy texture.
- Salt and Vanilla Serenade: Mix in sea salt and vanilla extract for extra flavor. These ingredients add depth and complexity to the caramel.
- Caramel’s Resting Place: Pour the caramel onto a parchment-lined pan and let it cool completely. This is crucial for setting the caramel properly.
- Cutting the Gems: Once set, cut the caramel into small squares using a sharp knife. These will be our little caramel gems.
- Salt’s Encore: Lightly sprinkle additional sea salt for enhanced flavor. This adds a delightful salty crunch to each bite.
- Chilling Out: Refrigerate the caramel pieces for at least 15 minutes to firm them up. This makes them easier to dip in chocolate.
- Chocolate’s Melting Moment: Use a double boiler to melt the chocolate slowly, ensuring it doesn’t burn. Patience is key here!
- Coconut Oil’s Shine: Stir in coconut oil for a smooth and glossy finish. This will make your chocolate coating look absolutely stunning.
- Chocolate’s Warm Embrace: Keep the chocolate at a warm but not hot temperature for easy dipping. This will prevent the chocolate from seizing.
- Dipping Delight: Use a fork or dipping tool to coat each caramel square in chocolate. This is where the magic truly happens!
- Excess’s Farewell: Let excess chocolate drip off before placing the candies on a parchment-lined tray. This will ensure a clean and professional finish.
- Setting the Stage: Allow the chocolates to set at room temperature or refrigerate for faster results. And then… enjoy!
Pro Tips for Caramel Perfection
Want to take your chocolate covered caramels to the next level? Here are a few of my favorite pro tips:
- Use a Candy Thermometer: A candy thermometer is your best friend when making caramel. It ensures that you reach the perfect temperature for a soft and chewy caramel.
- Don’t Overcook the Caramel: Overcooked caramel will be hard and brittle. Aim for a temperature of around 245°F (118°C).
- Use High-Quality Chocolate: The quality of your chocolate will directly impact the taste of your candies. Choose a chocolate that you love to eat on its own.
- Patience is Key: Don’t rush the process. Allow the caramel to cool completely before cutting it, and let the chocolate set properly before serving.
- Experiment with Flavors: Don’t be afraid to get creative! Add a pinch of cinnamon or a dash of espresso powder to the caramel for a unique twist.
Common Mistakes (and How to Avoid Them!)
We all make mistakes, especially when we’re learning something new. Here are a few common pitfalls to watch out for:
- Burning the Sugar: Keep a close eye on the sugar as it melts. If it starts to burn, it will taste bitter and ruin the whole batch.
- Seizing the Chocolate: Chocolate can seize if it gets too hot or comes into contact with water. Use a double boiler and avoid getting any water in the chocolate.
- Uneven Caramel: Stir the caramel constantly to ensure that it cooks evenly. This will prevent some parts from being overcooked while others are undercooked.
- Cutting Sticky Caramel: If the caramel is too sticky to cut, refrigerate it for a longer period of time. You can also lightly grease your knife with butter or coconut oil.
Variations: Let Your Creativity Shine!
This recipe is just a starting point! Feel free to experiment and create your own unique variations. Here are a few ideas to get you started:
- Nutty Delight: Add chopped nuts, such as pecans or walnuts, to the caramel for a crunchy texture.
- Espresso Infusion: Stir a teaspoon of espresso powder into the caramel for a coffee-flavored treat.
- Spiced Caramel: Add a pinch of cinnamon, nutmeg, or cardamom to the caramel for a warm and cozy flavor.
- Different Chocolate: Try using white chocolate or a combination of milk and dark chocolate.
- Sea Salt Swirl: Before the chocolate sets, sprinkle with flaky sea salt for a beautiful and flavorful finish.
- Chocolate with caramel is a great start, but don’t be afraid to dream bigger!
Storage: Keeping Your Treats Fresh
To keep your homemade chocolate caramels fresh and delicious, store them in an airtight container at room temperature for up to a week, or in the refrigerator for up to two weeks. Be sure to use parchment paper between layers to prevent sticking.
Frequently Asked Questions (FAQ)
- Can I use corn syrup in this recipe? While this recipe doesn’t call for corn syrup, some variations do. It can help prevent crystallization, but it’s not necessary for this particular recipe.
- Can I use milk chocolate instead of dark chocolate? Absolutely! The choice of chocolate is entirely up to you. Milk chocolate will result in a sweeter candy, while dark chocolate will have a richer, more intense flavor.
- How do I prevent the chocolate from seizing? The key is to melt the chocolate slowly and avoid getting any water in it. Use a double boiler and stir gently.
- My caramel is too hard. What did I do wrong? You likely overcooked the caramel. Use a candy thermometer to ensure that you reach the correct temperature.
- Can I freeze these candies? Yes, you can freeze these candies for up to two months. Wrap them tightly in plastic wrap and then place them in an airtight container.
- What does ‘at home is’ mean for this recipe? Making these at home is a way to customize your ingredients and sweetness, and create a more personal treat.
Serving Suggestions: A Sweet Celebration
These homemade salted caramel chocolate candies are perfect for any occasion! Here are a few ideas for serving them:
- As a Gift: Package them in a pretty box or tin and give them as a thoughtful homemade gift.
- For Dessert: Serve them as a sweet ending to a delicious meal.
- With Coffee or Tea: Enjoy them as a delightful accompaniment to your favorite hot beverage.
- At Parties: Add them to a dessert platter or candy buffet for a touch of elegance.
- Just Because: Treat yourself to a few of these candies whenever you need a little pick-me-up.
And there you have it! Your very own batch of homemade salted caramel chocolate candy. I hope you enjoy making and eating these as much as I do. Happy baking, sweet friends!

How to Make Salted Caramel Chocolate Covered Candy at Home
Ingredients
Method
- Warm sugar in a saucepan.
- Stir until melted and golden.
- Add butter, stir until incorporated.
- Gradually add heavy cream, stirring continuously.
- Mix in sea salt and vanilla extract.
- Pour caramel onto parchment and cool.
- Cut caramel into small squares.
- Sprinkle with sea salt.
- Refrigerate for 15 minutes.
- Melt chocolate in a double boiler.
- Stir in coconut oil.
- Keep chocolate warm for dipping.
- Coat caramel squares in chocolate.
- Let excess chocolate drip off.
- Let chocolates set at room temperature or refrigerate.
Notes
Loved this recipe? Save it to your favorite Pinterest board so you can easily find it later! ✨
