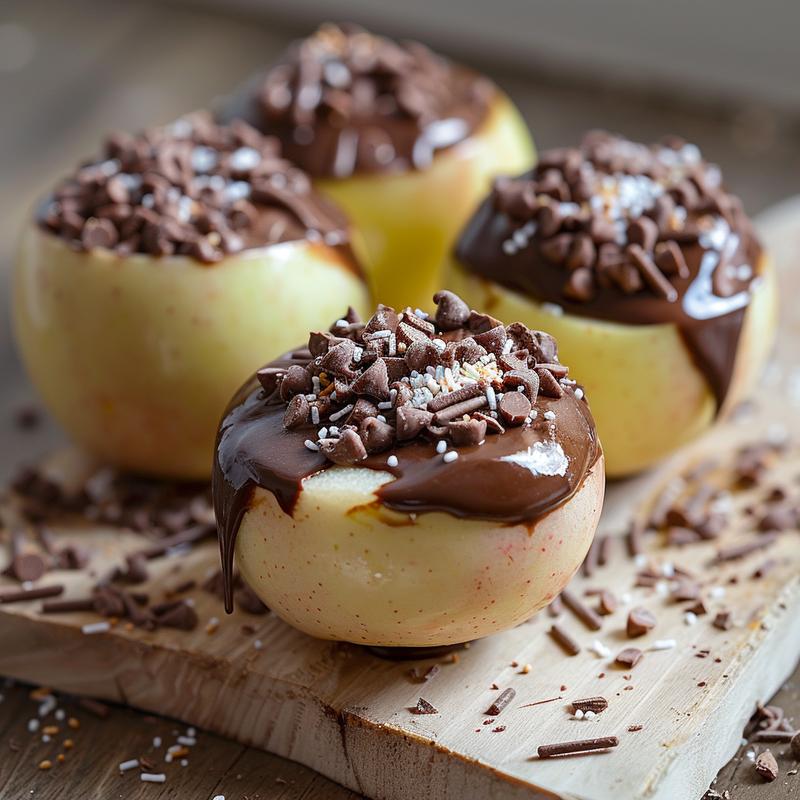
Easy Milk Chocolate Dipped Apples: A Sweet Slice of Happiness
Hello, sweet friends! Maya here, from SugarVela.com. Today, we’re diving into a recipe that’s so simple, so delightful, and so utterly perfect for bringing a little sparkle into your day: Milk Chocolate Dipped Apples. Imagine biting into a crisp, juicy apple embraced by a smooth, velvety coat of milk chocolate. Doesn’t that sound like a little celebration in every bite? It is! And trust me, if you can stir chocolate and hold an apple, you can absolutely make these. Let’s get started and create some edible magic!
Why You’ll Love These Chocolate Dipped Apples
These aren’t just any candy apples; they’re a mini-vacation for your taste buds! These candy apples are so easy to make, and there are so many reasons to fall in love with them. They’re perfect for a quick dessert, a fun activity with kids, or even a charming homemade gift. But beyond their versatility, here’s what makes them truly special:
- Simplicity Itself: You don’t need to be a pastry chef to whip these up. The recipe is straightforward and beginner-friendly. If you’re looking for a fun and easy treat, you can’t go wrong!
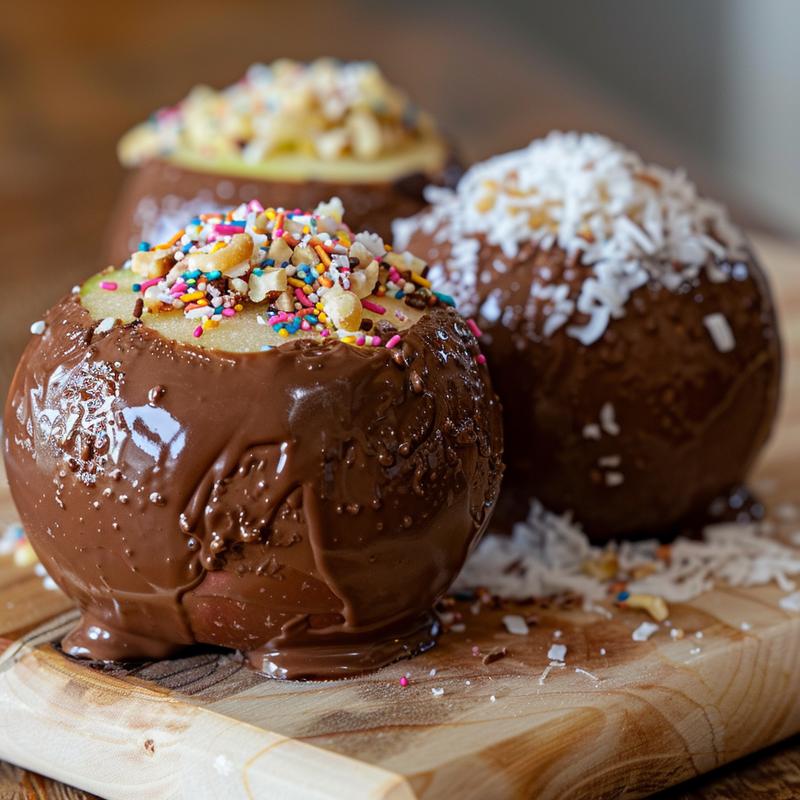
- Customizable Fun: From sprinkles to nuts, the topping possibilities are endless. These candy apples are a blank canvas for your creativity!
- That Perfect Crunch: The contrast between the crisp apple and the smooth chocolate is simply divine.
- A Sweet Escape: In just a few minutes, you can create a treat that feels like a special occasion.
Trust me; once you make these, they’ll become a staple in your sweet treat repertoire. They’re sure to be a hit!
Ingredients for Your Milk Chocolate Dipped Apples
Let’s gather our ingredients. Remember, the quality of your ingredients will shine through, so choose the best you can find. Here’s what you’ll need:
- 1 large apple (Granny Smith or Honeycrisp recommended): The tartness of a Granny Smith or the subtle sweetness of a Honeycrisp pairs beautifully with milk chocolate. Apples are the star of the show!
- 6 oz milk chocolate chips: Choose your favorite brand. The chocolate is what brings the magic together.
- 1 tablespoon coconut oil (optional, for smoother chocolate): This helps create a silky, glossy chocolate coating.
- Pinch of salt: Enhances the sweetness of the chocolate. Don’t skip this!
- Optional toppings: sprinkles, chopped nuts, shredded coconut. Let your imagination run wild.
See? Nothing too complicated. Just a few simple ingredients stand between you and chocolate-covered bliss.
Step-by-Step: Creating Your Chocolate Masterpiece
Now for the fun part! Follow these steps, and you’ll have gorgeous milk chocolate dipped apples in no time:
- Prep the Apple: Wash and thoroughly dry the apple. This is crucial! Any moisture will prevent the chocolate from sticking properly. Remove the stem and insert a popsicle stick or wooden skewer into the core. Make sure it’s secure.
- Melt the Chocolate: Melt the chocolate chips in a double boiler or microwave. If using a microwave, heat in 30-second intervals, stirring in between, until smooth. Stir in coconut oil (if using) and salt. The chocolate should be smooth and glossy. The chocolate is the key to this recipe!
- Dip and Drizzle: Dip the apple into the melted chocolate, rotating to coat evenly. Lift and let excess chocolate drip off. Don’t be afraid to get a little messy; that’s part of the fun!
- Add Toppings (If Using): Immediately sprinkle with your desired toppings. The chocolate needs to be wet for the toppings to adhere properly.
- Set and Chill: Place the dipped apple on a parchment-lined plate or baking sheet. Refrigerate for at least 30 minutes to allow the chocolate to set. They’re almost ready!
And there you have it! Beautiful, delicious milk chocolate dipped apples, ready to be devoured.
Pro Tips for Perfect Chocolate Dipped Apples
Even with a simple recipe, a few pro tips can elevate your creation from good to extraordinary:
- Dry Apples are Key: I can’t stress this enough! A completely dry apple ensures the chocolate adheres beautifully.
- Use High-Quality Chocolate: The better the chocolate, the better the flavor. Treat yourself to a good brand. You can taste the difference.
- Melt Chocolate Slowly: Patience is a virtue, especially when melting chocolate. This prevents burning and ensures a smooth consistency.
- Work Quickly with Toppings: The chocolate sets fast, so have your toppings ready to go.
- Chill Time is Crucial: Don’t rush the chilling process. It’s what gives the chocolate that perfect snap.
These little tricks will help you achieve chocolate-dipped apple perfection every time.
Common Mistakes to Avoid
We all make mistakes, especially when we’re learning. Here are a few common pitfalls to watch out for:
- Wet Apples: As mentioned before, this is a big one! Make sure your apples are bone dry.
- Burnt Chocolate: Overheating chocolate can make it seize up and become grainy. Melt it slowly and gently. Don’t let the chocolate burn!
- Too-Thick Chocolate: If your chocolate is too thick, it will be difficult to dip evenly. Add a little more coconut oil to thin it out.
- Rushing the Chilling Process: Give the chocolate ample time to set. Otherwise, it will be messy and melty.
Learning from these common mistakes will help you avoid frustration and create flawless dipped apples.
Variations: Let Your Creativity Shine!
This recipe is just a starting point. Feel free to experiment and create your own unique variations:
- Dark Chocolate Dipped Apples: Use dark chocolate chips for a richer, more intense flavor.
- White Chocolate Dipped Apples: A classic choice! You can even add food coloring to the white chocolate for a festive touch.
- Caramel Drizzle: Drizzle melted caramel over the chocolate for an extra layer of sweetness. This is one of my favorite variations!
- Chopped Nuts: Roll the dipped apples in chopped pecans, walnuts, or almonds.
- Sprinkles Galore: Use different colors and shapes of sprinkles for a fun and whimsical look.
- Crushed Cookies: Roll the dipped apples in crushed Oreos, graham crackers, or chocolate chip cookies.
- Sea Salt Sprinkle: A sprinkle of flaky sea salt on top of the chocolate enhances the sweetness and adds a lovely salty-sweet contrast.
- Ocean Candy Apples: For a fun twist, melt blue candy melts and add a touch of edible glitter to create a sweet ocean candy effect. You can even add gummy candies that look like sea creatures for an extra touch of whimsy! These sweet ocean candy apples are perfect for a themed party!
Don’t be afraid to get creative and personalize your dipped apples to your liking. The possibilities are endless!
How to Store Your Chocolate Dipped Apples
To keep your chocolate dipped apples fresh and delicious, store them in an airtight container in the refrigerator. They will last for up to 3 days. Make sure they are completely chilled before storing them to prevent the chocolate from sweating.
Frequently Asked Questions (FAQ)
- Can I use different types of apples? Absolutely! While Granny Smith and Honeycrisp are recommended, you can use any apple you like. Just make sure it’s firm and crisp.
- Can I use candy melts instead of chocolate chips? Yes, candy melts are a great alternative. They come in a variety of colors and are easy to melt.
- Can I make these ahead of time? Yes, you can make these a day in advance. Just store them in the refrigerator until you’re ready to serve them.
- My chocolate is seizing up. What do I do? Add a tablespoon of vegetable oil or shortening to the chocolate and stir until smooth. This should help to loosen it up.
Serving Suggestions: Sharing the Sweetness
These milk chocolate dipped apples are perfect for any occasion. Here are a few serving suggestions:
- Dessert for a Dinner Party: Serve them as a simple yet elegant dessert at your next dinner party.
- Homemade Gifts: Wrap them in cellophane bags and tie with a ribbon for a charming homemade gift.
- Party Favors: Give them out as party favors at your next celebration.
- Snack for Kids: A fun and healthy snack that kids will love.
No matter how you choose to serve them, these chocolate dipped apples are sure to bring a smile to everyone’s face. They’re perfect for sharing a little bit of sweetness and joy with the people you love. The candy coating is sure to be a hit!
So, there you have it! A simple, delightful recipe for milk chocolate dipped apples that’s sure to bring a little sparkle into your day. Remember, baking is all about having fun and creating something beautiful. Don’t be afraid to experiment and make it your own. And most importantly, enjoy the process! Happy baking, sweet friends!

Milk Chocolate Dipped Apple
Ingredients
Method
- Wash and dry apple. Insert stick.
- Melt chocolate, stirring in coconut oil and salt.
- Dip apple in chocolate, let excess drip.
- Sprinkle with toppings (optional).
- Place on parchment paper.
- Refrigerate for 30 minutes.
Notes
Loved this recipe? Save it to your favorite Pinterest board so you can easily find it later! ✨